What are Declarative Deployments, and why use them?
When getting started with ArgoCD, most people deploy ArgoCD applications using the UI. They click a few buttons, add details and press sync. While ArgoCD is a GitOps tool, this is a rather clickopsy approach to bootstrapping your GitOps.
To clarify, the YAML files you are deploying with Argo CD are always stored in Git. But the configuration file telling ArgoCD where to find those files can be defined in the UI (imperatively) or in Git itself (declaratively). In this tutorial, we will see the latter approach. We will deploy an ArgoCD Application Declaratively, using the pure GitOps approach.
When doing declarative ArgoCD Deployments, your Argo CD projects and applications will be defined as Kubernetes manifest files. Nothing will be defined in the ArgoCD UI.
We will have to get those configuration files into the cluster. Once they are in your cluster, the Argo CD controller will recognize them and begin the synchronization process.
Setting up Declarative Deployments with Argo CD
Let’s create an application in Argo CD that deploys a meme-generator application. It is a simple web app containing a Kubernetes Deployment and Service resource.
First, we will create an Argo CD Project. Then an Argo CD App inside that project. Finally, we will verify that our meme-generator web app was created.
All the source code and YAML files for this example are present in a GitHub repository.
Prerequisites
1. A Kubernetes cluster
2. Argo CD installed in the argocd namespace
Step 1: Creating an Argo CD Project YAML
Every Argo CD application must be deployed inside a project. Before creating our application, we’ll define the project itself using the AppProject Custom Resource Definition (CRD).
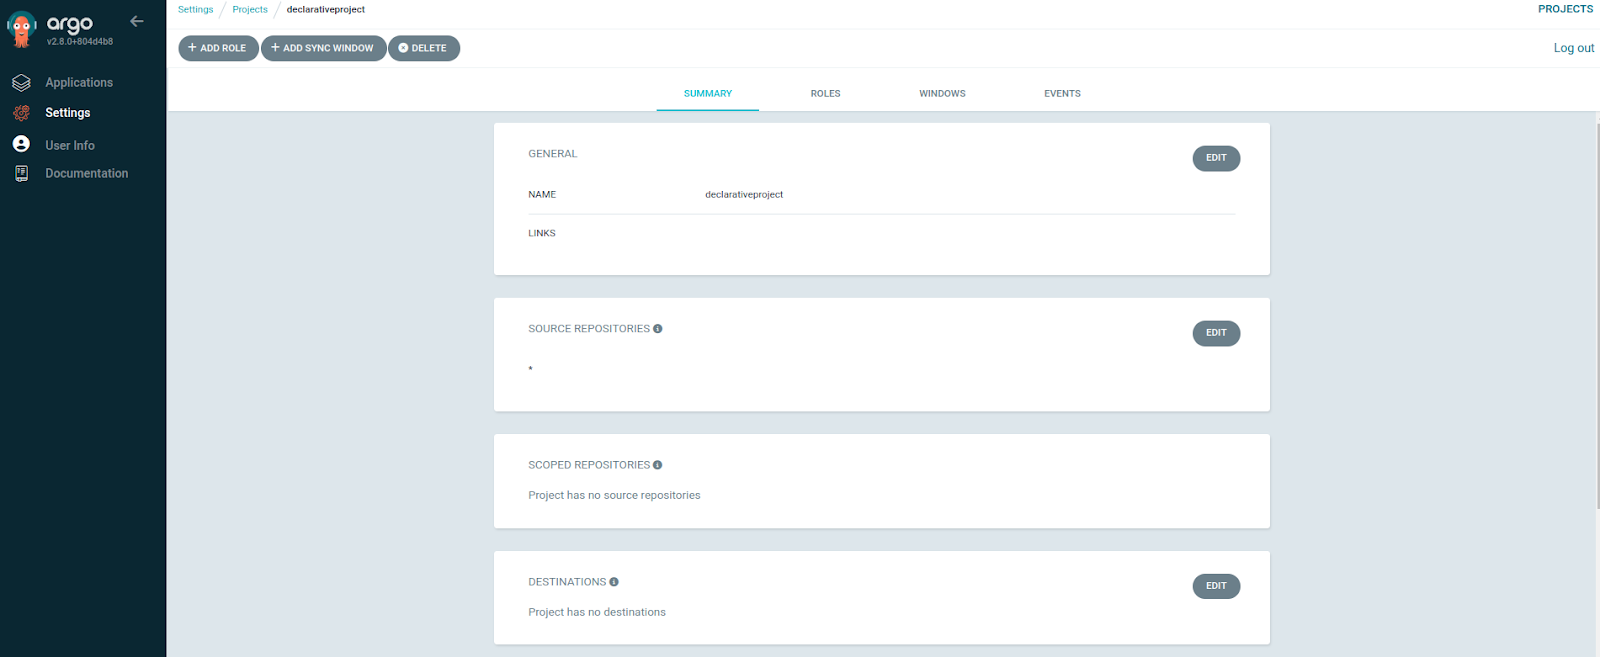
This is how the AppProject would look if you created it in the ArgoCD UI. (But obviously, we won’t use the UI. We will create an equivalent AppProject with declarative YAML.)

argoproject.yaml
To deploy the project, run:
kubectl apply -f argoproject.yaml
Here is a detailed explanation of what each line in this file does
- apiVersion - Source of the Argo CD CRD’s
- kind - Type of Kubernetes object, in this case an Argo CD AppProject
- metadata.name - Name of the project - used to filter apps in the UI
- metadata.namespace - Namespace where ArgoCD itself is installed (not necessarily the namespace that applications will be installed to)
- metadata.finalizers - Include this if you want apps and resources created under this project to be deleted when the project is deleted. Read more about finalizers here.
- spec.description - Details about the project - can be used to document what this project is for.
- sourceRepos - Can be useful for compliance purposes. Restrict deployment of manifests to specific repositories to ensure that only applications from this source are deployed into this project. In this case, '*', allows all repositories.
- destination.namespace - Helps you organize your applications by only allowing manifests in this project to deploy to the robustaargo namespace.
- destination.server - Cluster where the application needs to be deployed
Step 2: Creating an Argo CD Application YAML
Now we can create the actual Application in Argo CD.
This is how the Application would look if you created it in the Argo CD UI. (But again, we’re not doing that. We’re creating an equivalent Application with declarative YAML.)

All options in the Application YAMLfile are similar to what you would see in the UI.
argoapplication.yaml
Let’s break it down
- metadata.name - Name of the Argo CD application, used to identify in the UI or CLI
- metadata.namespace - Namespace where Argo CD is installed (not necessarily the namespace your manifests will be deployed to)
- source.repoURL - Location of your Git repository
- source.targetRevision - Name of the branch you want Argo CD to use manifests from.
- source.path - Git repository URL with your YAML files. (for example, the HTTPS URL of a GitHub repository)
- destination.server - Kubernetes cluster where you want the manifests to be applied.
- destination.namespace - Namespace to deploy the Kubernetes manifests.
- syncPolicy.automated - Automatically sync when the application state is out of sync.
Find all the options to configure your application here.
Run the following command to deploy the ArgoCD application
kubectl apply -f argoapplication.yaml
Step 3: Verifying the deployed application
ArgoCD password(Optional)
If you already have access to the UI and can log in, skip this step.
Run the command below to get the Argo cd login password. It is a common best practice to change the password and delete the secret after you log in the first time.
kubectl -n argocd get secret argocd-initial-admin-secret -o jsonpath="{.data.password}" | base64 -d
Port Forwarding
kubectl port-forward service/argocd-server -n argocd 8080:443
Log into the application with the username admin, and password from the previous steps.

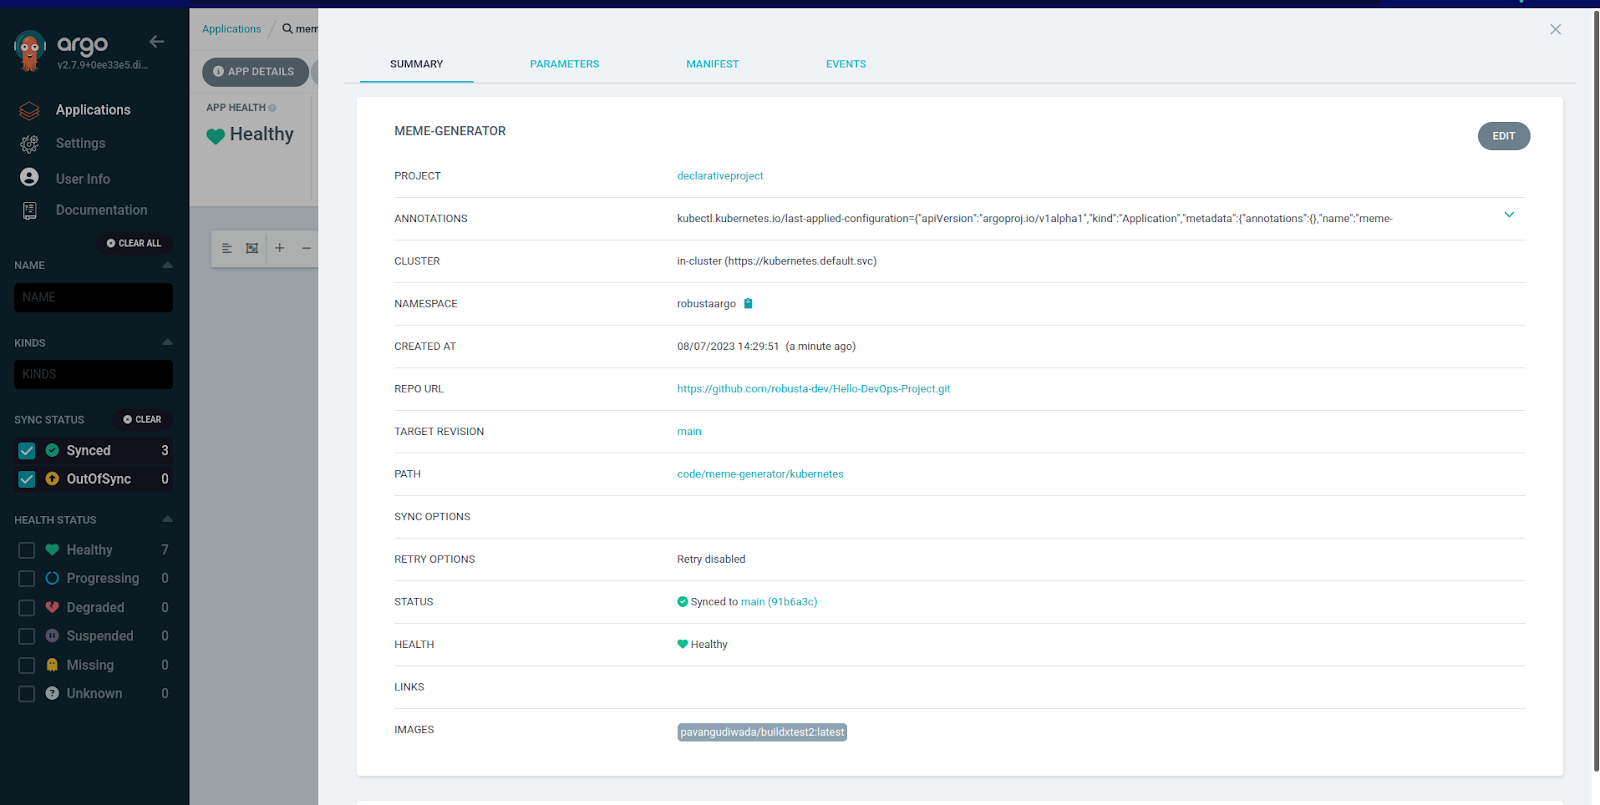
Successfully deployed project and application.

Additional Application Configuration Options
Just like in the UI, when defining Argo Applications declaratively, there are various configuration options for each of the CRDs.
Application Information
Additional info about the application, like the project website, Git repo, etc.
Sync Policy
Settings to configure Argo CD's behavior when your YAML files are out of sync. This is useful for automation of application deployment.
Sync Options
More options to manage how your manifests are deployed during a sync.
Revision History
Useful to perform rollbacks to older versions. Higher numbers increase the storage used (not advised).
Summary
In this blog post we explored why Declarative deployments are needed. We learned how to create a project and application in Argo CD using Kubernetes manifest YAML files.
If you use Helm with Argo CD, be sure to read our guide on Five Helm Tools for Improving Kubernetes Quality of Life.
Have any questions, comments, or suggestions? Feel free to reach out on Twitter, LinkedIn or via email. Thank you for reading.


